Poem for the week
23
Jun
2016
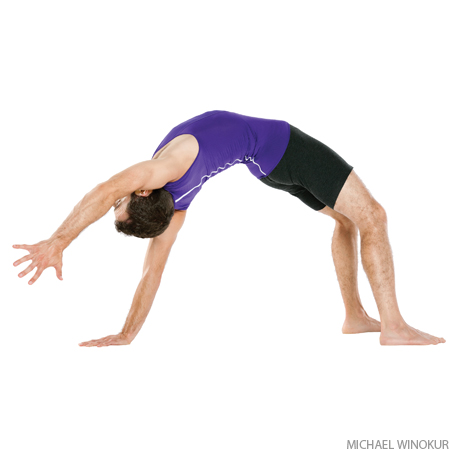
Wild Thing
Wild Thing: Step-by-Step Instructions
Start in Adho Mukha Svanasana (Downward-Facing Dog).
Bring your weight into your right hand and roll onto the outer edge of your right foot like Vasisthasana (Side Plank Pose).
On an inhalation, lift your hips with buoyancy. Stay strong in your right hand making a clawing action with the fingers. Keep the head of the right arm bone back. On an exhalations, step your left foot back and place your toes on the floor with your knee partially bent.
Curl back through your upper back to create a sweeping action of the shoulder blades into the back of the rib
On an inhalation lift your hips higher until you curl more into a backbend with your right foot solid on the ground.
Keep breathing and curl your head back, extending your left arm from your heart and expressing your power and fre
Hold for 5-10 breaths breaths, return to Down Dog and repeat on the other side.
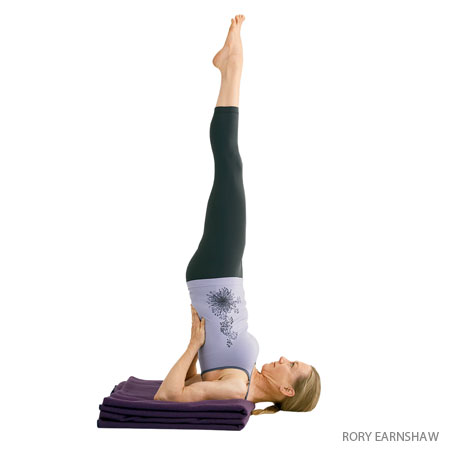
Supported Shoulderstand
(sah-LOM-bah sar-van-GAHS-anna)
salamba = with support (sa = with
alamba = support)
sarva = all
anga = limb. There are variations of Shoulderstand that are “unsupported†= niralamba, pronounced near-ah-LOM-bah)
Supported Shoulderstand: Step-by-Step Instructions
Fold two or more firm blankets into rectangles measuring about 1 foot by 2 feet, and stack them one on top of the other. You can place a sticky mat over the blankets to help the upper arms stay in place while in the pose. Then lie on the blankets with your shoulders supported (and parallel to one of the longer edges) and your head on the floor. Lay your arms on the floor alongside your torso, then bend your knees and set your feet against the floor with the heels close to the sitting bones. Exhale, press your arms against the floor, and push your feet away from the floor, drawing your thighs into the front torso.
Continue to lift by curling the pelvis and then the back torso away from the floor, so that your knees come toward your face. Stretch your arms out parallel to the edge of the blanket and turn them outward so the fingers press against the floor (and the thumbs point behind you). Bend your elbows and draw them toward each other. Lay the backs of your upper arms on the blanket and spread your palms against the back of your torso. Raise your pelvis over the shoulders, so that the torso is relatively perpendicular to the floor. Walk your hands up your back (toward the floor) without letting the elbows slide too much wider than shoulder width.
Inhale and lift your bent knees toward the ceiling, bringing your thighs in line with your torso and hanging the heels down by your buttocks. Press your tailbone toward your pubis and turn the upper thighs inward slightly. Finally inhale and straighten the knees, pressing the heels up toward the ceiling. When the backs of the legs are fully lengthened, lift through the balls of the big toes so the inner legs are slightly longer than the outer.
Soften the throat and tongue. Firm the shoulder blades against the back, and move the sternum toward the chin. Your forehead should be relatively parallel to the floor, your chin perpendicular. Press the backs of your upper arms and the tops of your shoulders actively into the blanket support, and try to lift the upper spine away from the floor. Gaze softly at your chest.
As a beginning practitioner stay in the pose for about 30 seconds. Gradually add 5 to 10 seconds to your stay every day or so until you can comfortably hold the pose for 3 minutes. Then continue for 3 minutes each day for a week or two, until you feel relatively comfortable in the pose. Again gradually and 5 to 10 seconds onto your stay every day or so until you can comfortably hold the pose for 5 minutes. To come down, exhale, bend your knees into your torso again, and roll your back torso slowly and carefully onto the floor, keeping the back of your head on the floor.